How to apply eye shadow!
Even if you are 14 learning how to do makeup or 60 years old wanting to perfect doing your
makeup, anybody can do it. Applying your makeup should be therapeutic and enjoyable rather than
frustrating or intimidating. Eye makeup can be daunting but not impossible. Just like everything else in
life, it takes practice. To make sure you are set up for success you will need to right tools and techniques.
You are going to want at least one blending brush. If you want to stick with just getting one brush, be sure
to get a multi-purpose brush. You can ask the person at the makeup store to help you if you need it.
Before you get too excited and begin to apply any eye shadow, be sure to get yourself a good primer. A
primer is going to set in place your eye shadow so that it stays on all day regardless of eye rubbing or
sweat. If you lean towards having oily eyelids, you are going to NEED an eye shadow primer. Why put
on the eye shadow if its just going to crease up and come off a few hours later?
Most eye shadow looks can easily be created with four shades: a neutral shade for your lid, a
medium shade for your crease, a dark shade for your outer corner, and a light shade to highlight your
inner corner and brow bone. Regardless of the look you’re going for, your look with require a neutral base
color. A color that can be easily be blended into other colors to give a soft and blended look. For natural
looks you’re going to want to use a more skin color based eye shadow to blend. If you’re wanting to do
more of a red/brown look, you’re going to want to use a base shade of an orange or beige. This same
technique applies to any color look.
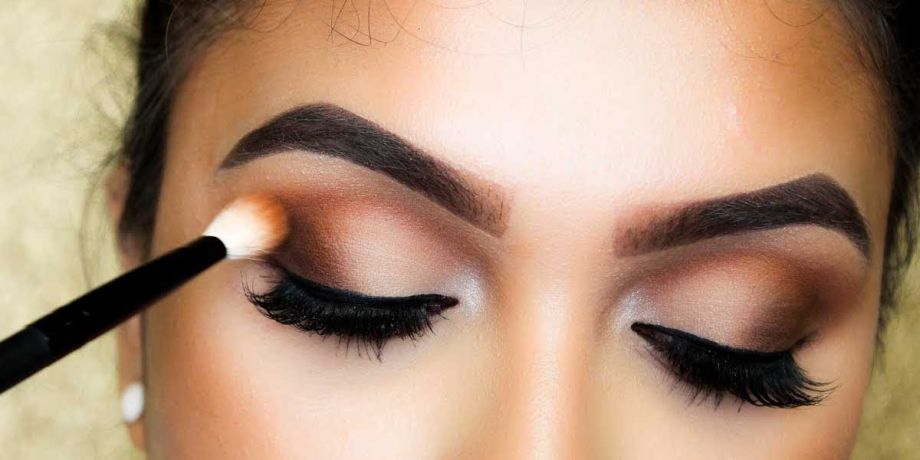
Now we’re going to define your crease to give your eye makeup more definition. This will also
make your eyes look wider and bigger overall. For a natural look, dip your fluffy or angled crease brush
into your medium eye shadow shade. Then, close your eye and apply the eye shadow along where your
eyelid meets your brow bone, creating a wash of color (as opposed to a thin, hard line). If you have deep-
set or hooded eyelids you can apply the crease shade with your eyes open to see where it’ll be most
visible. This will likely above your actual eyelid on the lower brow bone.
Blending is one of the most important and often overlooked steps. This step helps create that
illusion that your eye shadow is naturally gradient. Blending gets rid of any harsh lines that may be there
between two or more colors. Use a clean blending brush to diffuse the shades on your crease and outer V
until they blend seamlessly into your lid. Your outer v is going to be the outside corner of your eye and
the V technique is just blending it up and down in a “V” shape. If you end up over-blending some of the
medium or dark pigment, no worries. Just use a crease brush again to pat some more shadow in, then
blend, blend, blend.
Before you call it a day, it’s time to highlight. Use your lightest eye shadow shade to make your
eyes really pop. A highlight under the brow is nice to pop the brows from the eye shadow. Some people
even place a little highlight inner corners to wake up a tired eye. In general, a light matte eye shadow will
give you a fresh, natural look perfect for daytime. For more drama, use a shade with some shimmer. You
can also use your regular face highlighter for optimal shine. Whichever shade you decide to use, you’ll
want to apply it along your brow bone (just below the arch of your eyebrow) to give your face a wide-
awake and lifted look.
Make sure any harsh edges are blended out, and that’s it! Your eye shadow is done! Finish the look with
mascara and a little something to define your eyebrows, and you’re ready to go.


